*Level of the job: 1 (1 to 5, 1 = easy 5 = difficult)
*Required (special) tooling: crimping tool, wire stripper, wire cutter
*Required parts: good copper wires
*Required technical data (think info sheets etc.): none
*Estimated time: Once you get the trick, minimal time involved.
This time i will show how to make a good crimp connection, most of us will have made one allready, but i am going a bit deeper into the details of making a good connection that lasts. In my work as a (former) car mechanic i have seen burnt out dashboards, faulty ECU's and a whole truckload of mallfunctions all thanks to radio's or that set of foglights being pinched in an existing wire loom with bad connectors, bare wires just twisted together and isolated with tape; some people should be ashamed of themselves

Roughly, this is what you need:
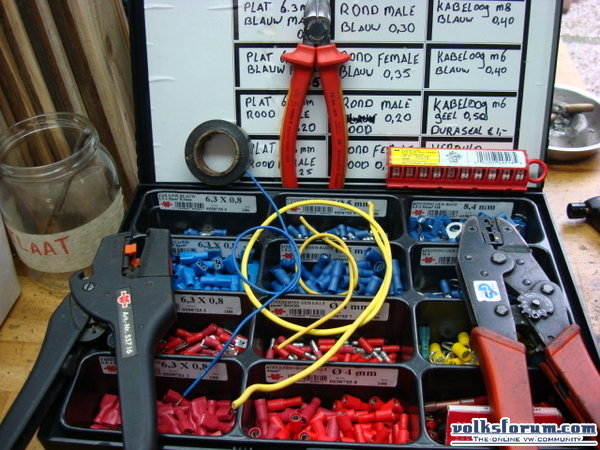
Wire stripper, wire cutter, crimping tool, crimp connectors (or AMP's)
Extra's: digit tape, insulation tape, heat shrink
The samples used are 0.75mm2, 1.5mm2 and 4mm2, commonly used in cars.
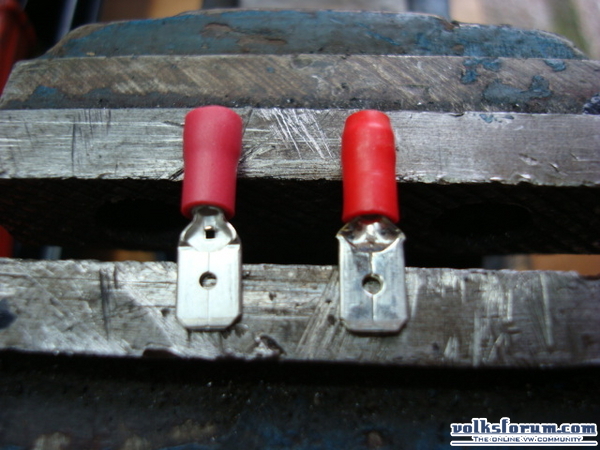
The subject of tonight; the connectors. On the left the model of a manufacturer who clearly got the message, made of aluminium, with a barrier installed to point out how far the wire should be inserted. On the right a cheaper model with a harder plastic as insulation, made of tinned copper and without a barrier. Both models are up to the job, but there is a difference in price and durability


Strip down a wire +/- 10mm and try the application, some connectors need more, some less. As the wire is stripped, you do NOT touch it anymore, no twisting up the strands etc. Twisting it up will cause the connector to have less grip on it and the connection will be less dureable. The wire that i am using here is the absolute minimun for this connector; 0.75mm2. Roughly said half the max wire thickess can go in a connector; max wire thicknesses are - red 1.5mm2 / blue 2.5mm2 / yellow 4mm2 (AWG18 / AWG15 / AWG11)
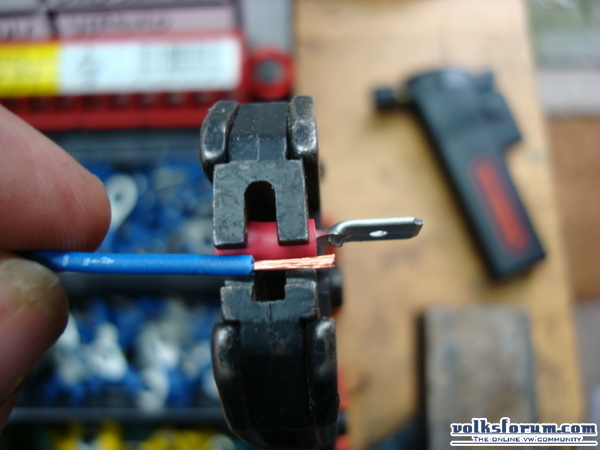
The crimping tool; good to see here that this is a double pinching tool, one for the insulation, one for the wire. Tools that only pinch one time and require two seperate pinches are absolutly unsuitable for a good connection

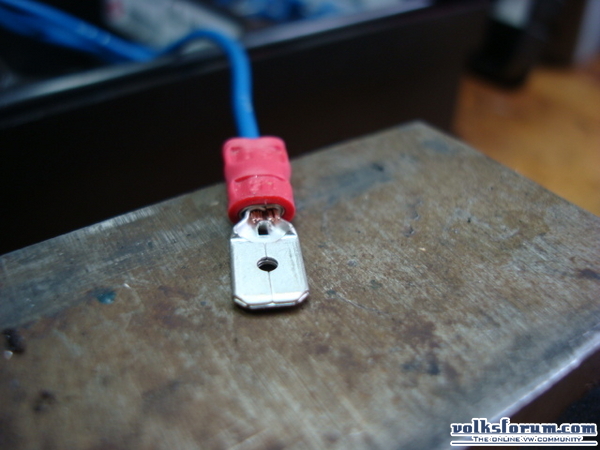
Crimp the connector and here is the result above, shaped as a half infinity sign, with max contact between wire and connector.
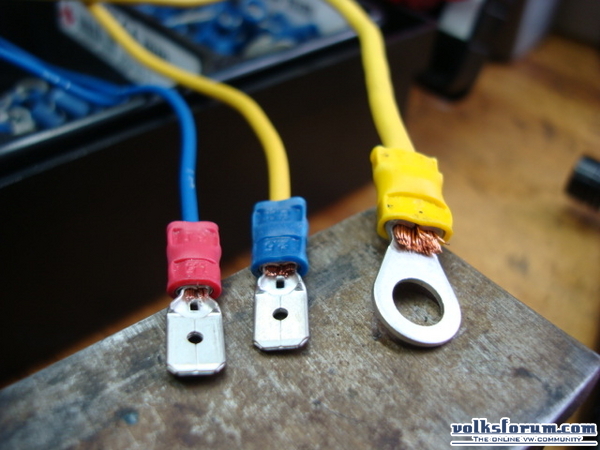
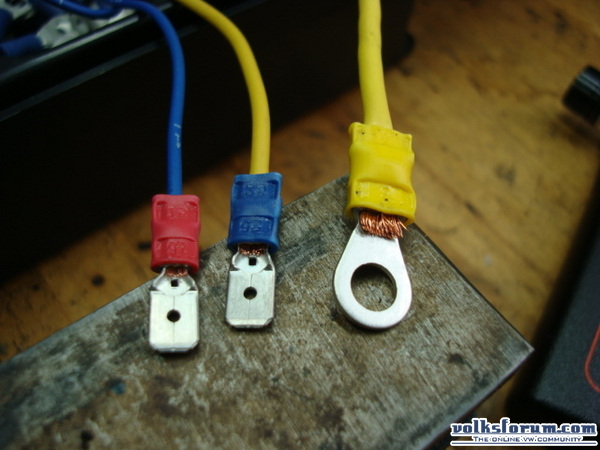
3 examples of crimped connectors, the tool visibly leaving a mark on the insulation, you know it was done right

For use outside the passenger compartment, this is my way to finish them;

When (expensive) waterproof connectors are not in your budget or unavailable, i recommend to totally soak them in vaseline (acid-free) and to put heat shrink over the connection, it will last

Sometimes, escpecially on oldtimers, the copper of a wire can see totally blacked out, no solder will flow and no other means of connection are possible, that is when i turn to this connector:
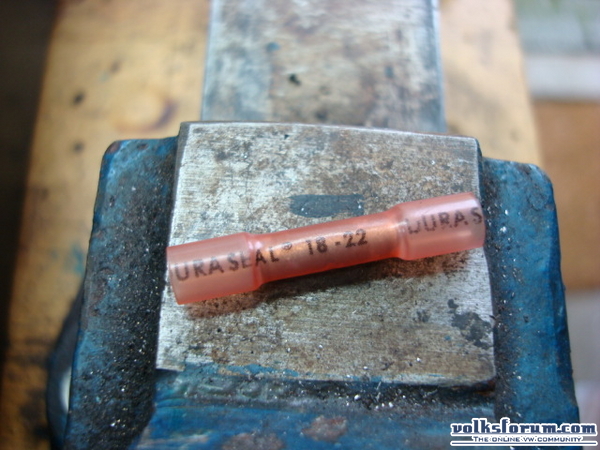
My supplier calls this the "duraseal" and no they are not cheap...in basic it's a standard connect-through item, but the shell has a suprise to it...


The proces of use is the same, strip the wire, insert both sides and crimp, nothing fancy so far, but then you take a torch or paint stripper and heat it from the middle section outwards.
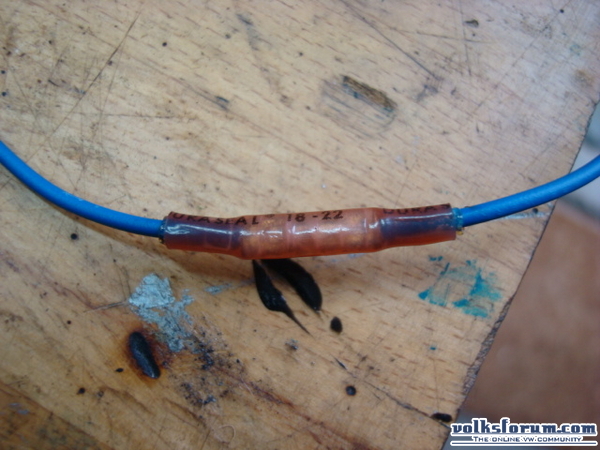
Inside the tube, that is actually a firm heat shrink, is an amount of wax that is released as the tube shrinks

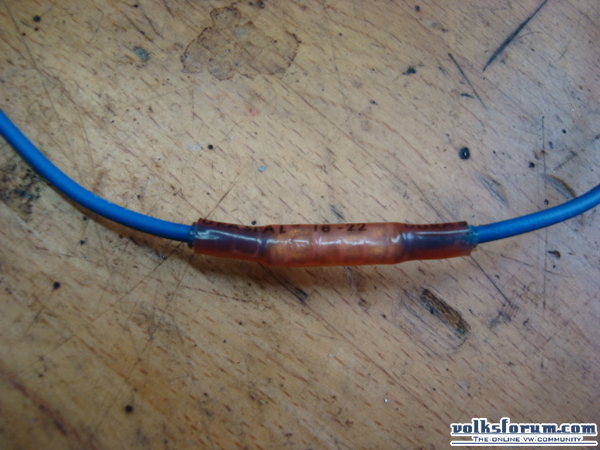
You keep heating until the tube is shrunk all the way and wax comes out both sides of it,
the connection is now waterproof and ready to go.
It is a verry expensive connection compared to a normal crimp connector, but some circumstances ask for this to be used

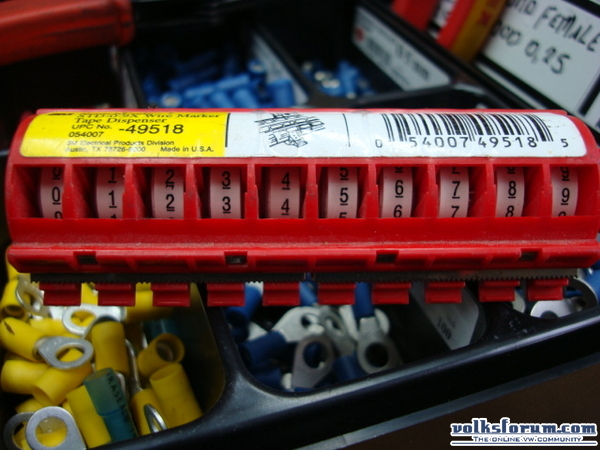
When cutting up a big loom, this is a handy piece of kit; digit-tape, going from 0 to 9 you can assign avery wire a number and run even the biggest wire job down to a simple follow through

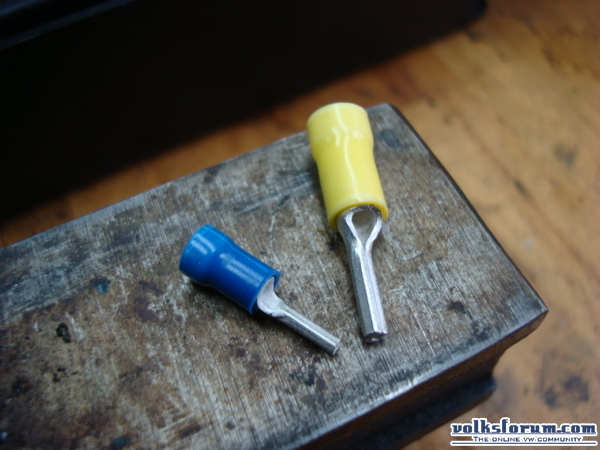
One last remark on working with terminal bloks and stranded wires, stranded wire under a screw will allways damage the strands an cause resistance in time, resulting in the built up of heat and, at high current, fires, therefore allways use a decent ferrule when working with terminals and non-solid (aka stranded) wires
